Guide to using the logbook app for the first time
First opening
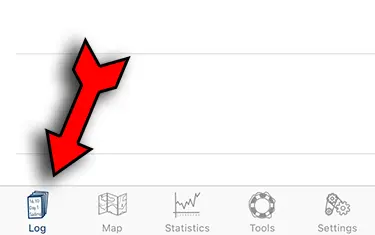
Log and are explained in more detail below:
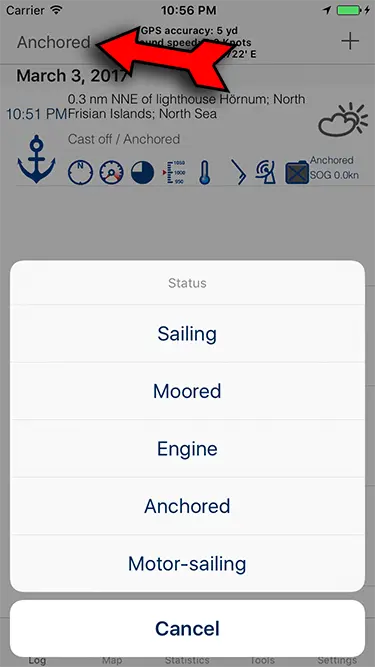
Status) using the button at the top left. This can be, Moored, Anchored, Motoring or Sailing. It is important to always keep this status up to date, as this value is used to calculate the statistics for the trip. So every time you change from one status to another, be sure to update the Status in the app. Each status change in the app automatically creates the corresponding logbook entry. This one task is the only thing you need to keep up to date during your trip in order to have a meaningful logbook at the end.
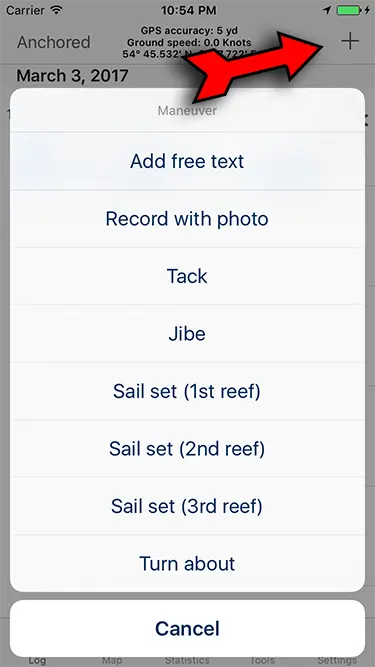
Quick maneuver according to your own wishes. Some people, for example, want to enter exactly which side the sail is on and which one. All these entries can be customized and reordered in this list according to your own wishes.
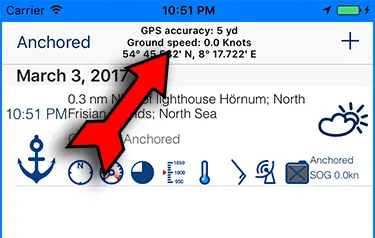
GPS accuracy) you can switch the recording of automatic logbook entries on and off. There is also a switch in the tab Settings ➡️ GPS SERVICES ➡️ Automatic entry every.... If these automatic entries are active, this is indicated by a blue frame in the app and a blue status symbol outside the app. (The signaling outside the app is only visible if you have set the app's location access to 'in use' in the iOS settings)
Trip preparation
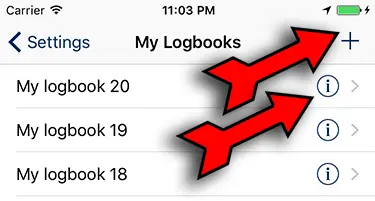
Settings ➡️ LOGBOOKS tab and create a new logbook for your trip. Tap on the (i) on the right and fill in everything as required.
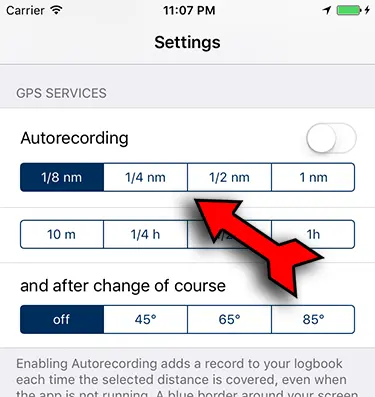
Settings ➡️ GPS SERVICES tab and set when an entry should be created if auto-entries are active (=blue frame visible). It is better to create more entries at the beginning than too few (you can always delete them, creating them later is more difficult). You can also hide the automatically created entries in the overview and later in the PDF export. For a trip in the North Sea, Baltic Sea or Adriatic Sea, 1/4 nautical mile is a good guide, for an Atlantic crossing one entry every hour is sufficient.
Starting the trip
When you have arrived on the ship, you can add the first logbook entry using the plus button at the top right. E.g. with the text "Ship taken over by the charter company, the deck light is broken, we have informed the charter company of this, catering has also already been loaded".
If you then think about leaving the port, change the status from Moored to Motoring. In the standard setting, the auto entries are now switched on (= blue frame is now visible, if not see paragraph below). Now drive out of the harbor and remember as soon as you set sail to change the status from Motoring to Sailing as soon as you set sail. If you now see dolphins or there is a significant COLREGs situation or another case occurs and you want to note this in the logbook, create an entry using the plus button with a suitable text or picture. You can of course still go into the entry and adapt it accordingly. At some point later you will recover the sails and then please don't forget to change the status from Sailing to Motoring. As soon as you are in the bay and the anchor is at the bottom and the engine is off. Change the status from Motoring to Anchored and this time the automatic entries will also switch off, depending on the setting, or you will have to do this yourself as described above (= there should no longer be a blue frame).
Now you can go to the tab Statistics and view your first day in figures.
End trip
On the last day after the status has been changed back toMoored because you are back in port and auto entries have been deactivated, you can export the final logbook. Go to the tab Tools ➡️ Export Logbook tab and select the desired font below, as well as whether you want to export the automatically created entries (which you have not changed manually) or only those that you have changed at least once.
Tip for automatic recording
check whether you have set that you have not linked the switching on or off of the automatic entries to the status: In the tabSettings ➡️ GPS SERVICES ➡️ you can Set Autorecording when switching status on or off.
Then the recording (recognizable by the blue frame) switches on automatically when you switch to the status Motoring or Sailing and automatically switches off when you switch to the status Moored or Anchored. So you cannot forget to switch the automatic recording (blue frame!) on or off.
But don't forget to change the status the next morning and start the recording.(If you don't want to forget this either, take a look at the reminder functions with geofencing ).
Another little tip:
It is also good if you simply try this out beforehand in a test logbook that you can create. And then simply generate data by car, bike, train, streetcar or on a walk. Then you'll be experienced on the boat straight away.
Further helpful information
There are different types of entries that you will see, an overview of which you will find in the maintenance entries.And if you want to have your currently selected logbook available on multiple devices, go to the tab
Settings ➡️ LOGBOOKS ➡️ Logbook Sync ➡️ and follow the instructions to integrate the logbook on other devices.